Fáilte!

The people we choose to share our ups and downs with in life are our best friends, our confidants.

Wednesday, December 1, 2010

It’s a Blast from the Past!

There’s nothing like delving into the past to get a kick out of old TV shows. Doogie Howser, M.D. is…is just perfect for such an occasion. Is it just me or does Neil Patrick Harris look like he’s 12? God bless 1980’s television putting nurses in a “scrubs dress”. Watching that made me giggle like a little school girl. But it made me think, there are some things from the past that are good. Such as a good old fashioned breakfast of champions. There’s no better way to start the day, not with the breakfast burritos or pop tarts that stores offer now, than with a full breakfast of home fries, bacon, and Eggs Benedict with hollandaise sauce. As delicious as this is, this is a rare treat for us because we don’t like to eat meals that are full of calorie heavy dishes all in one meal J I’ll start with the home fries because they take the longest.
The original recipe is from Allrecipes.com and I was pretty happy with it, but I made my own changes to it in order to spice it up.
Home Fries
  • 6 medium russet potatoes, cubed
  • 1/4 cup and 2 tablespoons butter or margarine
  • salt and pepper to taste
  • ¼-1/2 onion
  • 2 shallots – optional
  • 1 clove garlic, minced
  • ¼ leeks (light green and white part only), chopped - optional
  • Pinch of cayenne
1.      Rinse potato cubes with cold water, and drain well.
2. Melt butter or margarine in a large skillet over medium heat. Sauté the onion, shallots, leeks, and garlic until they’ve all sweat.

3. Place potatoes in the skillet, and stir to coat with butter. Season with salt, pepper, and cayenne.
4. Cover with a lid, and cook for 10 minutes. Remove the lid, and cook for another 10 minutes, turning frequently until brown and crisp on all sides
                                                
Amount Per Serving  Calories: 199 | Total Fat: 8.8g | Cholesterol: 23mg
Can’t forget to make the bacon!
                                                       
I made the English muffins the day before so these were already made, but I’ll give you the recipe, it’s also from Allrecipes.com I chose this one because it had such high ratings.
English Muffins
Makes 18 - 20
-          1 cup milk
-          2 tablespoons white sugar
-          1 (.25 ounce) package active dry yeast
-          1 cup warm water (110 degrees F/45 degrees C)
-          1/4 cup melted shortening
-          6 cups all-purpose flour
-          1 teaspoon salt
1.      Warm the milk in a small saucepan until it bubbles, then remove from heat. Mix in the sugar, stirring until dissolved. Let cool until lukewarm. In a small bowl, dissolve yeast in warm water. Let stand until creamy, about 10 minutes.
2.      In a large bowl, combine the milk, yeast mixture, shortening and 3 cups flour. Beat until smooth. Add salt and rest of flour, or enough to make a soft dough. Knead. Place in greased bowl, cover, and let rise.
3. Punch down. Roll out to about 1/2 inch thick. Cut rounds with biscuit cutter, drinking glass, or empty tuna can. Sprinkle waxed paper with cornmeal and set the rounds on this to rise. Dust tops of muffins with cornmeal also. Cover and let rise 1/2 hour.
4. Heat greased griddle. Cook muffins on griddle about 10 minutes on each side on medium heat. Keep baked muffins in a warm oven until all have been cooked. Allow to cool and place in plastic bags for storage. OR preheat oven to 375 degrees F and bake for 8 minutes each side.
5. To use, split and toast. Great with orange butter, or cream cheese and jam.
Amount Per Serving  Calories: 190 | Total Fat: 3.5g | Cholesterol: 1mg

Hollandaise Sauce
*This recipe is from the movie Julie and Julia. I liked this recipe over other Hollandaise sauce recipes because it tastes lighter and it has less fat in it than others. 
Makes 1 c                    Takes 15 minutes                    Has only 1 gram of fat/tbsp
-          1 tbsp butter
-          ¾ c nonfat buttermilk, divided or see TIP below
-          1 tbsp cornstarch
-          ½ tsp salt
-          Pinch cayenne pepper, or to taste
-          1 large egg, lightly beaten
-          1 tbsp lemon juice
1.      Melt butter in a small saucepan over low heat. Cook, swirling the pan, until the butter turns gold, 30-60 seconds. Pour into a small bowl and set aside.
2.      Whisk ¼ c buttermilk, cornstarch, salt and cayenne in a heavy medium saucepan until smooth. Whisk in egg along with the remaining ½ c buttermilk.
3. Set the pan over medium-low heat and cook the sauce, whisking constantly, until it comes to a simmer.
4. Cook, whisking, for 15 seconds. Remove from heat and whisk in lemon juice and the reserved butter. Serve hot or warm. Classic variations to make sauce Moutarde, add 2 tsp Dijon mustard. For sauce Maltaise, use 1 ½ tbsp orange juice in place of the lemon juice.
**TIP: You can use powdered buttermilk and reconstitute according to directions, or make sour milk by mixing 1 tbsp lemon juice or vinegar to 1 c milk.
And Lastly, poach the eggs to complete the eggs benedict breakfast meal!
-          Eggs (however many you want to make for everyone)
-          2 tbsp white vinegar
-          Water
1.      Fill pot with 4” water and add the vinegar. Bring to a steady simmer.
2.      Break the eggs into a bowl carefully not to break them.  Hold the edge of the bowl close to the water and tilt the egg into the water. Repeat with all the eggs. Cook about 3 minutes until whites are cooked through but the yolk is still runny.
3.      Carefully remove the eggs, one at a time, with a slotted spoon, and drain on paper towels.
Put together however you please! Enjoy.

Tuesday, November 30, 2010

Good Ol' American Pie II

To continue the previous post...
4. Preheat oven to 425 degrees F.
5. Heat ½ c butter, flour, ¼ c water, and ½ c brown sugar. Bring to a boil and simmer until it thickens up a little. Pour over the apple filling carefully.
 6. Now onto the topping. Mix the flour, oats, sugar, and nutmeg in a b owl. Drizzle melted butter over the top and stir until it all becomes moist, or almost all of it does. Spread evenly on top of the pie so it covers all of the apples so they don’t burn.
 7. Bake in 425 degree F oven for 15 minutes. Then turn down the heat to 350 degrees F and bake for another 30-45 minutes. Enjoy!
Pie Crust
-          ½ lb (2 sticks) margarine or butter (I used unsalted)
-          2 ¼ c flour (I used all purpose)
-          6 tbsp cold water
-          ½ tsp salt

1.      Mix the flour well with the salt.
2.      Cut the butter/margarine and flour together with a pastry blender, or cut the butter into pea size chunks. Gently mix into the flour with two forks in a fluffing motion.
3.      Sprinkle cold water over the top of the flour mixture, a tablespoon or two at first. Toss this top layer lightly with a fork until large lumps of dough form. Push these aside and sprinkle more water on top, repeat until all is moist.
4.      Gather the lumps of dough together into a loose ball. It shouldn’t be too sticky, but if it’s hard to handle flour hands. Handle with a light touch and DON’T KNEAD IT! Lightly pat the dough with the heel of your hand until you have a smooth ball. Dough that’s handled too much gets tough so be easy on it! Your hand’s heat will start making the butter soft.
5.      Wrap and chill the dough for 30+ minutes.
6.      Preheat oven to 350 degrees F.
7.      Flour the work surface then cut the dough into two pieces. Shape each piece into a hamburger with smooth edges. Keep the work surface lightly floured.
8.      Roll the dough from the center out in a clockwise direction, lifting the rolling pin as you reach the edges. This keeps the dough evenly round and prevents the edges from getting thinner than the center.
9.      Fold the dough into quarters carefully, making it easy to lift without tearing. Place the corner into the center of pan and unfold.
10.  Bake pie crust if necessary for 20-24 minutes in the preheated oven. (Not all pies will require an already baked crust.) Pull out and let cool.
It smelled so good while it was baking I had my mouth watering. By time David got home I was practically chomping at the bit to dig in. So after David got home and we ate dinner I went ahead and served it up. In David’s words, “That is fantastic pie.” How can I argue with that? Which made me think of this fact I found when I googled Apple Pie’s history:
In 1590 Robert Green (1558-1592), an English poet, said he could
think of no greater compliment in praise of a lovely lady. He wrote
the following in his prose called Arcadia, "They breath is like the
steame of apple-pyes."
So I am certainly not the first or only person to love this fruit. Now that I was curious, I was intrigued to find out  more about apples history. A quick search on Google.com told me that the remains of apples are found among excavations at Jericho in the Jordan Valley and are dated to 6,500 B.C. Then dried apple slices were found on saucers in the tomb of Queen Pu-Abi at Ur near Basara, in Southern Iran, linking royalty to the irresistible seduction of apples which was dated to 2500 B.C. And finally in 384-322 B.C. Aristotle was said to have kept death away by holding an apple and inhaling its life sustaining fragrance. Finally and consciously he drops the apple thus releasing his soul. Wow, interesting stuff.

Good Ol’ American Pie

Over the weekend David and I went to a local Farm Market with a couple we’re friends with and had a great time picking out locally grown apples. Since its apple season I thought it’d be a good idea to focus on baking apples so I could put together a delicious apple pie.
I love apples, I have since I was little, and I can remember learning about apples and Johnny Appleseed in first grade and being fascinated. So, when I read some information  about it on www.Wikipedia.com it didn’t  surprise me that since the beginning apples have been associated with love, beauty, luck, health, comfort, pleasure, wisdom, temptation, sensuality, sexuality, virility and fertility. In Greek mythology, Gaia, or Mother Earth, presented a tree with golden apples to Zeus and his bride Hera on their wedding day. Guarded by Ladon, a serpent who never slept, the apple tree was in the garden of the Hesperides, daughters of the Evening Star. These golden apples became involved with many tales of love, bribery and temptation.
So back to my story, at the local Farmers Market I mostly picked out Rome and Stayman apples since they’re good for baking. Earlier in the week I made David one of his favorite desserts, Lemon Meringue pie, and I had extra pie crust so I thought I’d use it for this apple pie. So I gathered all the ingredients and got ready to bake!
This crust recipe came from David’s grandmother, and the pie recipe I tweaked combining ideas from several different recipes. I decided to use the crumb topping (found at http://heavenlyhomemakers.com/crumb-topping-premade)
Apple Pie Recipe


·         Crust (recipe below)
Filling
·         3 lbs apples
·         ½ c sugar
·         ½ c brown sugar
·         1 tbsp cinnamon
·         ¼ c water
·         ½ c butter
Topping
·         ½ c flour
·         ½ c oats
·         ¼ tsp nutmeg
·         2 tbsp sugar
·         3 tbsp melted butter
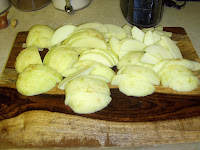
  1. Peel and cut apples into either chunks or slices.

2. Mix with cinnamon and ½ c sugar. Stir and cook over medium heat until tender.
3. While the apples cook roll out the crust and fit into the pie pan (9”). Pour the filling into the pie crust.

Homemade Goodness!

Vanilla Extract
Our friend was generous to gift me a bunch of extra vanilla beans that she had, and since I’ve been cooking/baking a lot recently I decided I’d follow her example and make some homemade vanilla extract. This was especially appealing because many of the recipes I have call for “pure” vanilla extract, not imitation. Only, at the store the “pure” stuff is like $14 bucks for a small container. Waaaay too expensive for the amount I have been using in the last few months.
She gave me a couple different ones like, Madagascar and Tahitian. I had to look up the differences between these types and I found that (according to Wikipedia) Madagascar beans are powerful, dark, full vanilla flavor beans, while Tahitian beans are more fruity and floral.  Then I read that the Mexican variety has just a hint of sweet creaminess. While I was reading up on vanilla beans, I came across the same advice several times: The best way to buy them (most economical) is to get them online. It also said that vanilla is the second most expensive spice after saffron. So, if you’re in the market for v-beans, or you plan on trying out this little home project after you read this post, I would look into buying them on the internet. A lot of the stores I’ve walked in had vanilla beans priced around $3 per bean! No thank you! I will stick to the better prices through online vendors.
FUN FACT: In 1841, a 12-year-old French-owned slave by the name of Edmond Albius, discovered the vanilla orchid could be hand pollinated, allowing global cultivation of the plant (According to Wikipedia.com).
Anyway, so I picked out my beans and started this project, excited and a little giddy with the prospect of what I could make when this was done….
·         A high-proof alcohol like vodka, bourbon or rum.  Go for the 80 proof + varieties.
·         Three vanilla beans per cup of alcohol
1.      Use a sharp paring knife to cut lengthwise down the center of the vanilla beans, leaving about an inch at the top of the vanilla bean uncut.
2.      Put the vanilla beans in a glass jar with a tight fitting lid.  I used mason jars.
3.      Cover the beans completely with alcohol. It’s three vanilla beans per cup of alcohol, so if you use 2 cups of vodka split open six vanilla beans and throw them in the jar.
4.      Tightly cover the jar and give it a good shake.  Store in a cool dry place for two months.  Give the bottle a good shake every week or so, just so you don’t forget all about it. Here are my “before” and “Almost done” pictures. 
                               9/6/10                               10/25/10                                          11/18/10
                                Start                       1 month 20 days later            2 months 2 weeks later

5.      After two months have passed, your vanilla extract should be ready for your favorite recipes.  
*If you have friends who love to bake or are hobby bakers, but they haven’t done this yet, you could put the extract in cute bottles and give them as gifts. They will love this, especially if they are poor student bakers, they will definitely appreciate the upgrade in this ingredient. If you plan on doing a lot of that or if you’re just a maniac baker J then you could get a giant glass bottle and do what this blogger did (I love reading her blog) http://heavenlyhomemakers.com/how-to-finish-your-homemade-vanilla-extract
Now, with the holidays approaching I will have plenty of vanilla extract to make all sorts of goodies. I have a whole list that I will post very soon...


Friday, October 29, 2010

A mouth watering copycat

I forgot to credit David’s grandmother for her Picadillo recipe. It was a family recipe that she passed on to her daughter and grandkids.  David told me that it was a treat that all the kids looked forward to having at the family dinners when his family got together at his mother’s parents house.  It was a weekly event that was much anticipated. In the end, I think David is very excited/happy that I am enjoying some of his families recipes.
This recipe is from Food.com and it’s their “copycat” recipe for the Macaroni Grill. It’s for the delicious bread they give to you when you get seated and are waiting for your food to come out. I love it especially with their dipping oil. So, when I saw this recipe I was excited, but I wasn’t expecting it to ACTUALLY be a copycat. Copycats usually aren’t replicas of the original, instead, they’re mostly recipes that are inspired by the original. So imagine my (delighted) surprise when this really did come out smelling, and even tasting, like the stuff you get with an overpriced dinner!  
Rosemary Bread
Makes 1 loaf
-         1 tbsp yeast
-         1 tbsp sugar
-         1 c warm water
-         2 ½ c flour
-          1 ½ tsp salt
-         2 tbsp rosemary, fresh and chopped or dried
-         2 tbsp butter

1.     Place yeast, sugar and water in a large bowl and let sit for about 10 minutes, until it’s frothy.
2.     Mix in butter, salt and flour. Add rosemary. Knead for about 10 minutes or until smooth and elastic.
3.     Add more flour if necessary. Oil the bowl and put dough in it to rise for an hour or so (until it doubles in size), making sure to cover with a towel.
4.     Punch down the dough and divide in half. Let it rest 5 minutes. Spray loaf pan and shape into the pan.
5.     Sprinkle the remaining rosemary over the loaf and press lightly into the surface. Let rise another hour (until doubled again).
6.     Preheat oven to 375 degrees F.  Bake for 15-20 minutes, or until lightly browned. Carefully remove from the oven. Brush with remaining butter. Liberally salt the top with salt (kosher, sea, or table) or to taste.
*Serve with some dipping oil (extra virgin olive oil) and some fresh cracked pepper.